Configuring NB Defense for Azure ML Notebooks
This section outlines the steps for installation of NB Defense in Azure Machine Learning Studio.
-
Open the notebook you want to scan in JupyterLab by accessing the Editor menu as shown below:
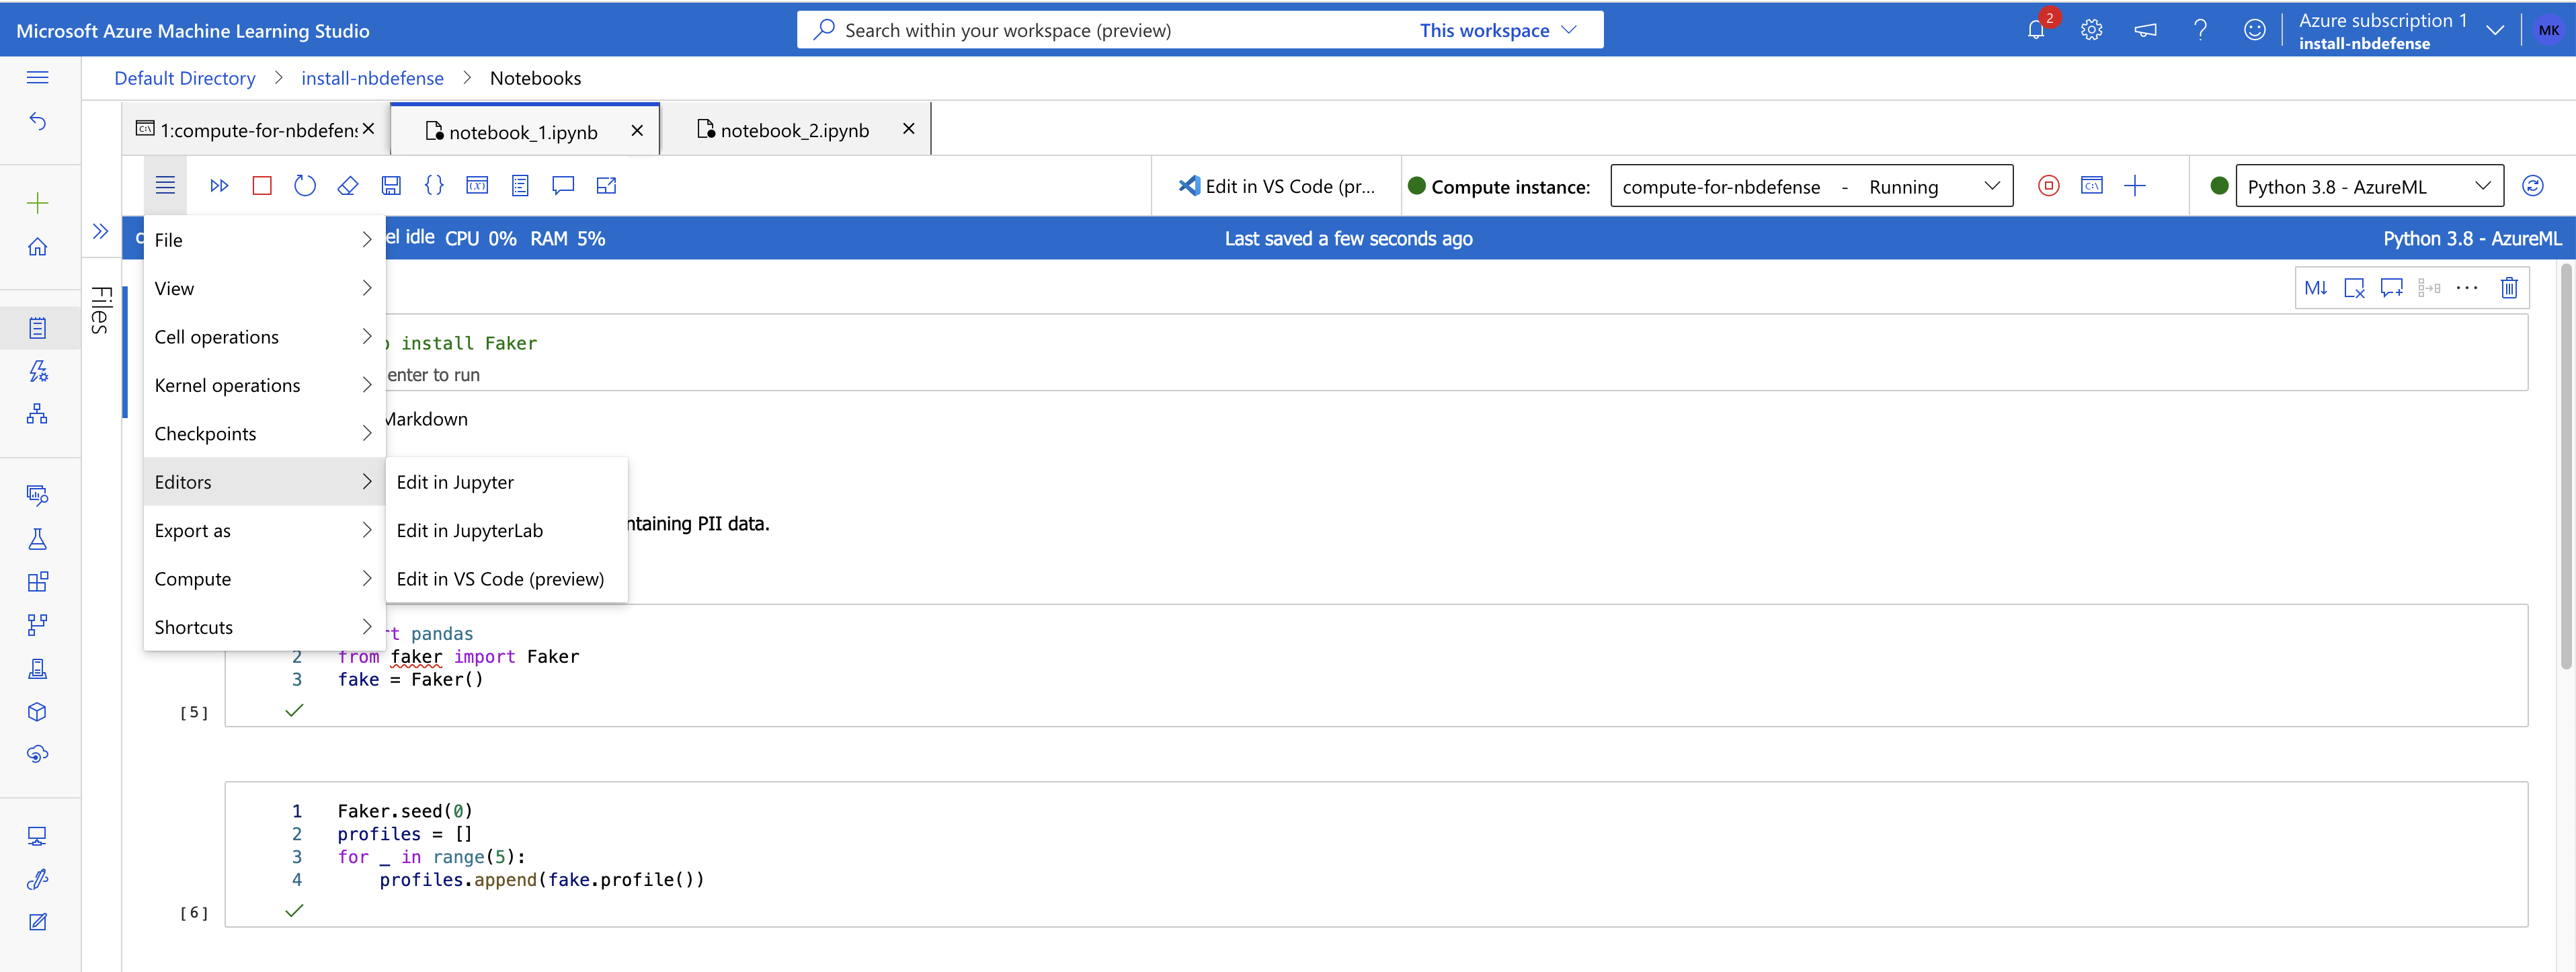
Open jupyter notebook in JupyterLab using Azure Machine Learning Studio. -
From JupyterLab, open a new terminal.
-
Activate
jupyter_envenvironment using the following command: -
The JLE can now be installed using the following command:
-
Once NB Defense is installed, enable the extension using the following command:
-
Optionally you can also run:
to ensure the extension is enlisted. The above two commands should give an output similar to the one below: both commands list nbdefense_jupyter.
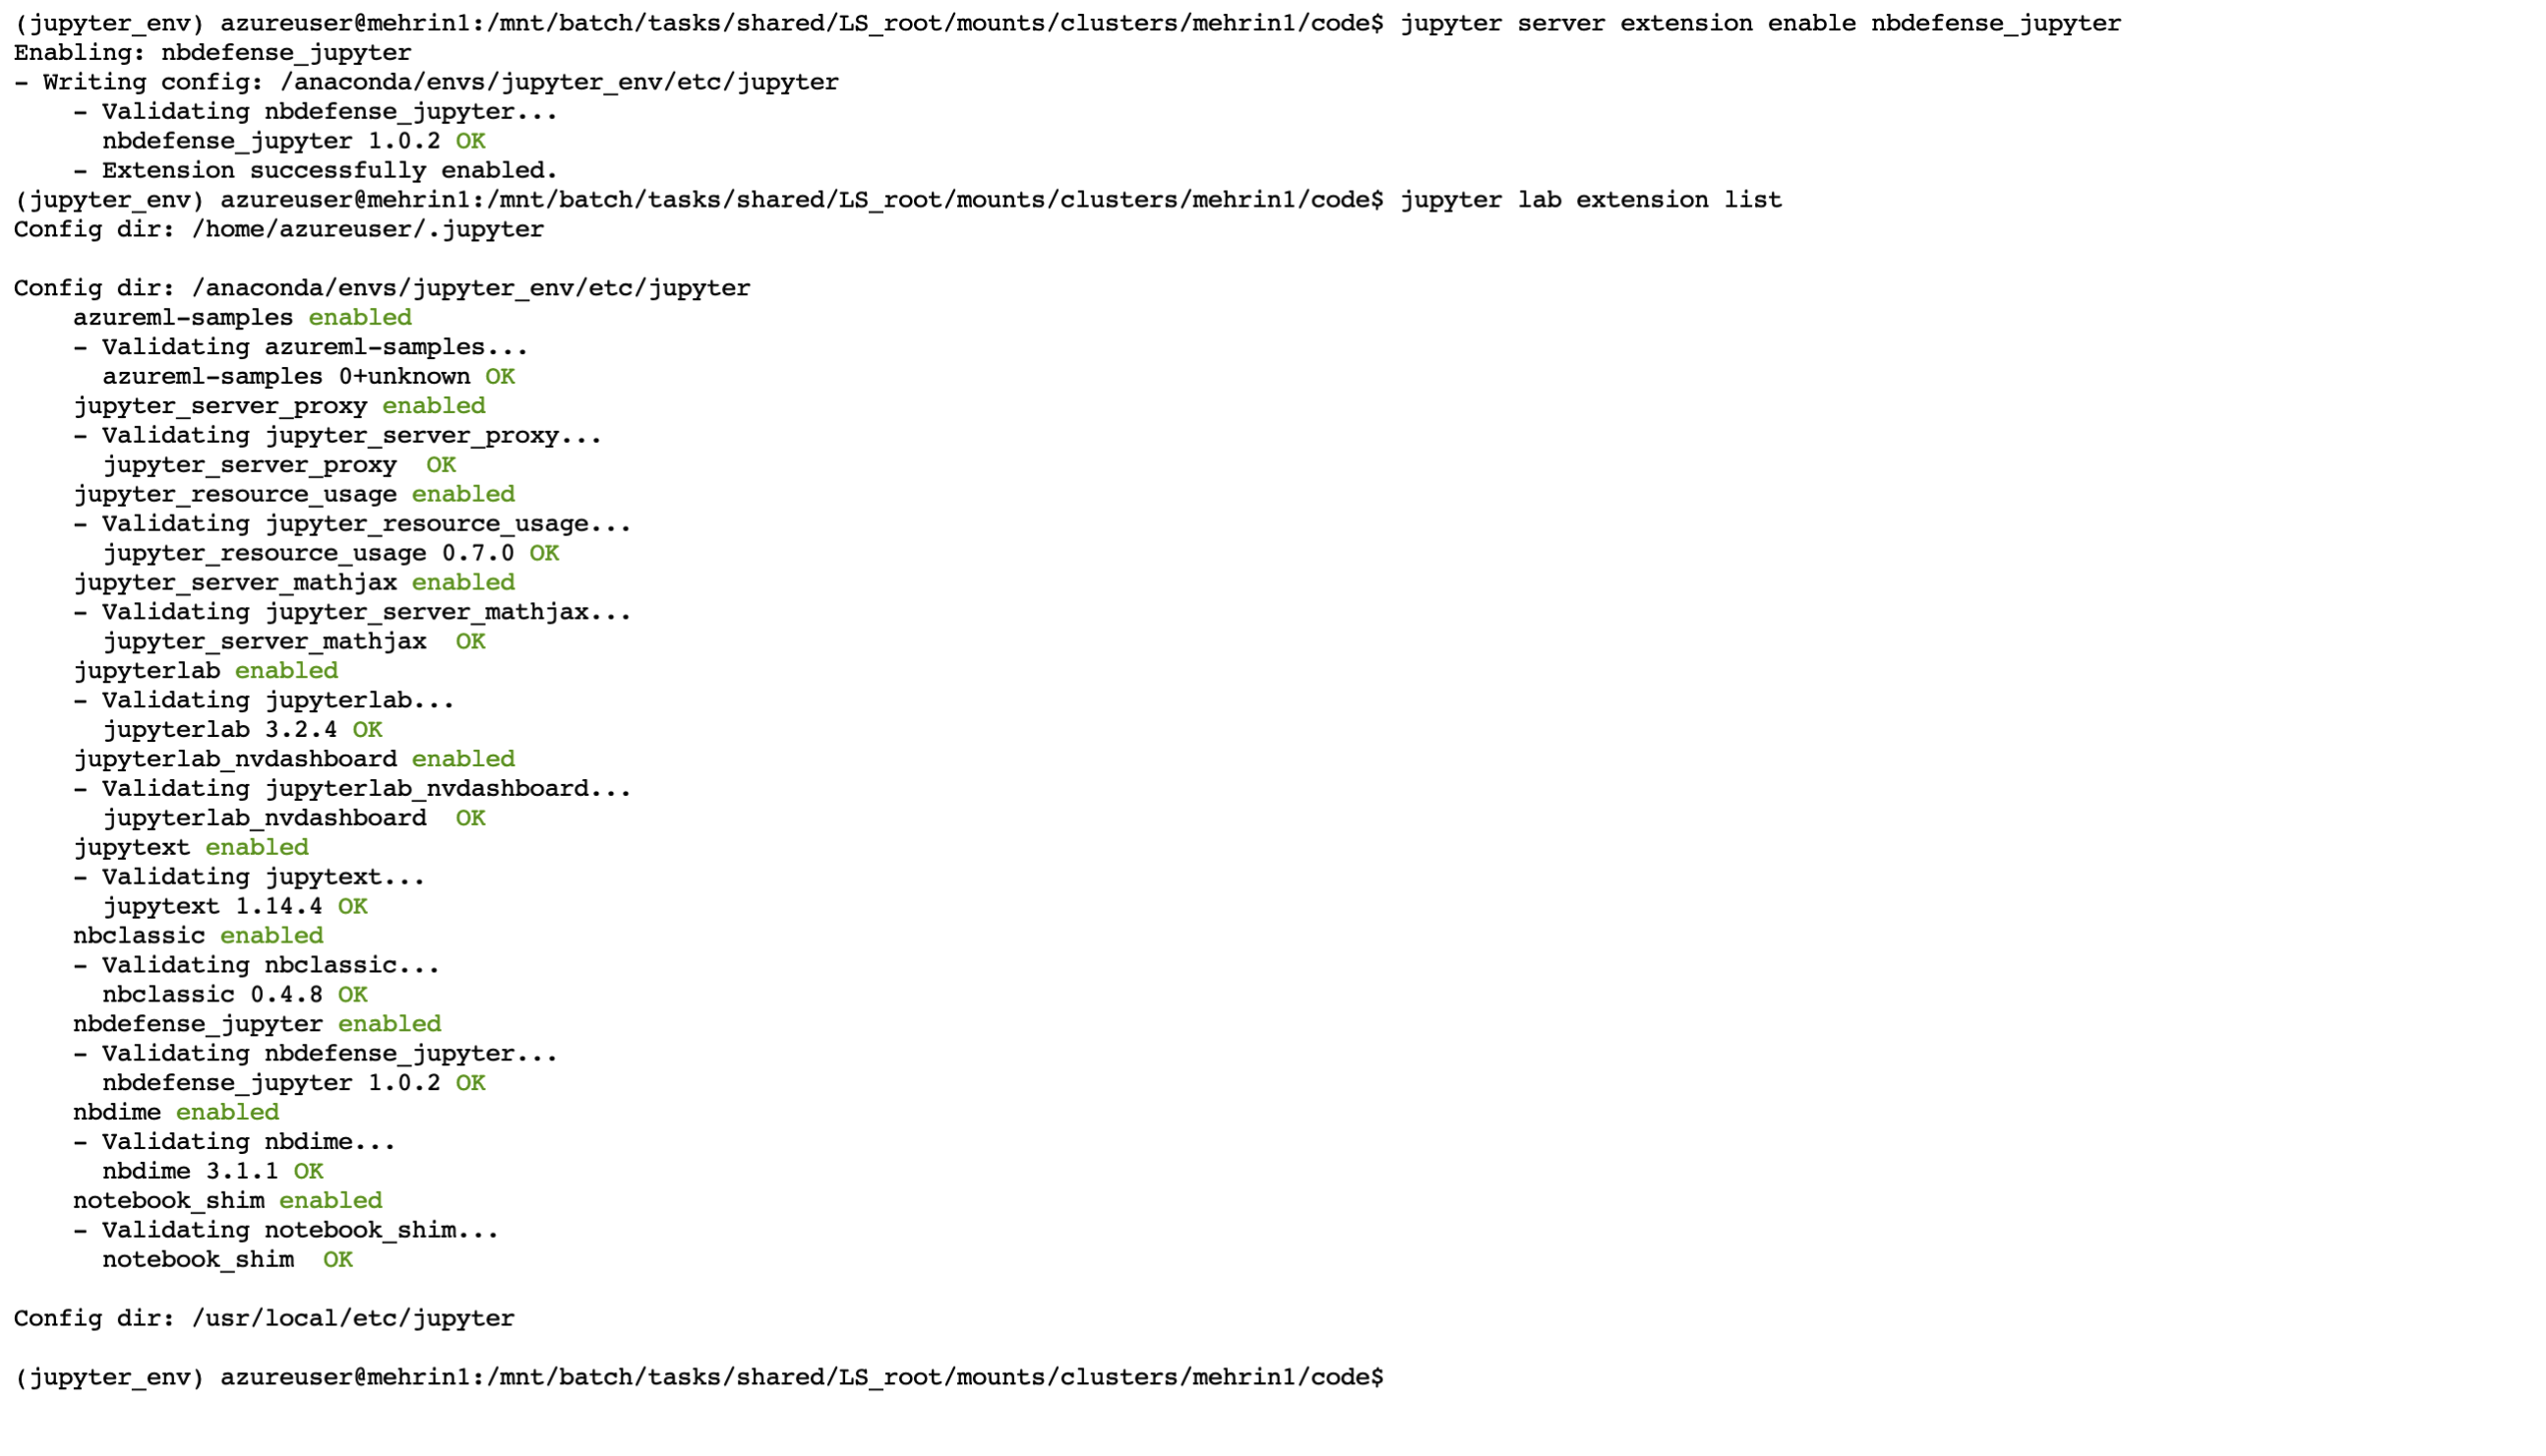
Enabling the NBDefense JupyterLab Extension (JLE) in Azure Machine Learning Studio. -
Restart the jupyter server using:
and refresh the browser. This should show the NB Defense widget installed in the left menu:
-
Refresh the JupyterLab webpage (CMD+R on a Mac or CTRL+R on a Windows machine). You should now be able to see the NBDefense JLE widget on the left hand side of the JupyterLab UI.
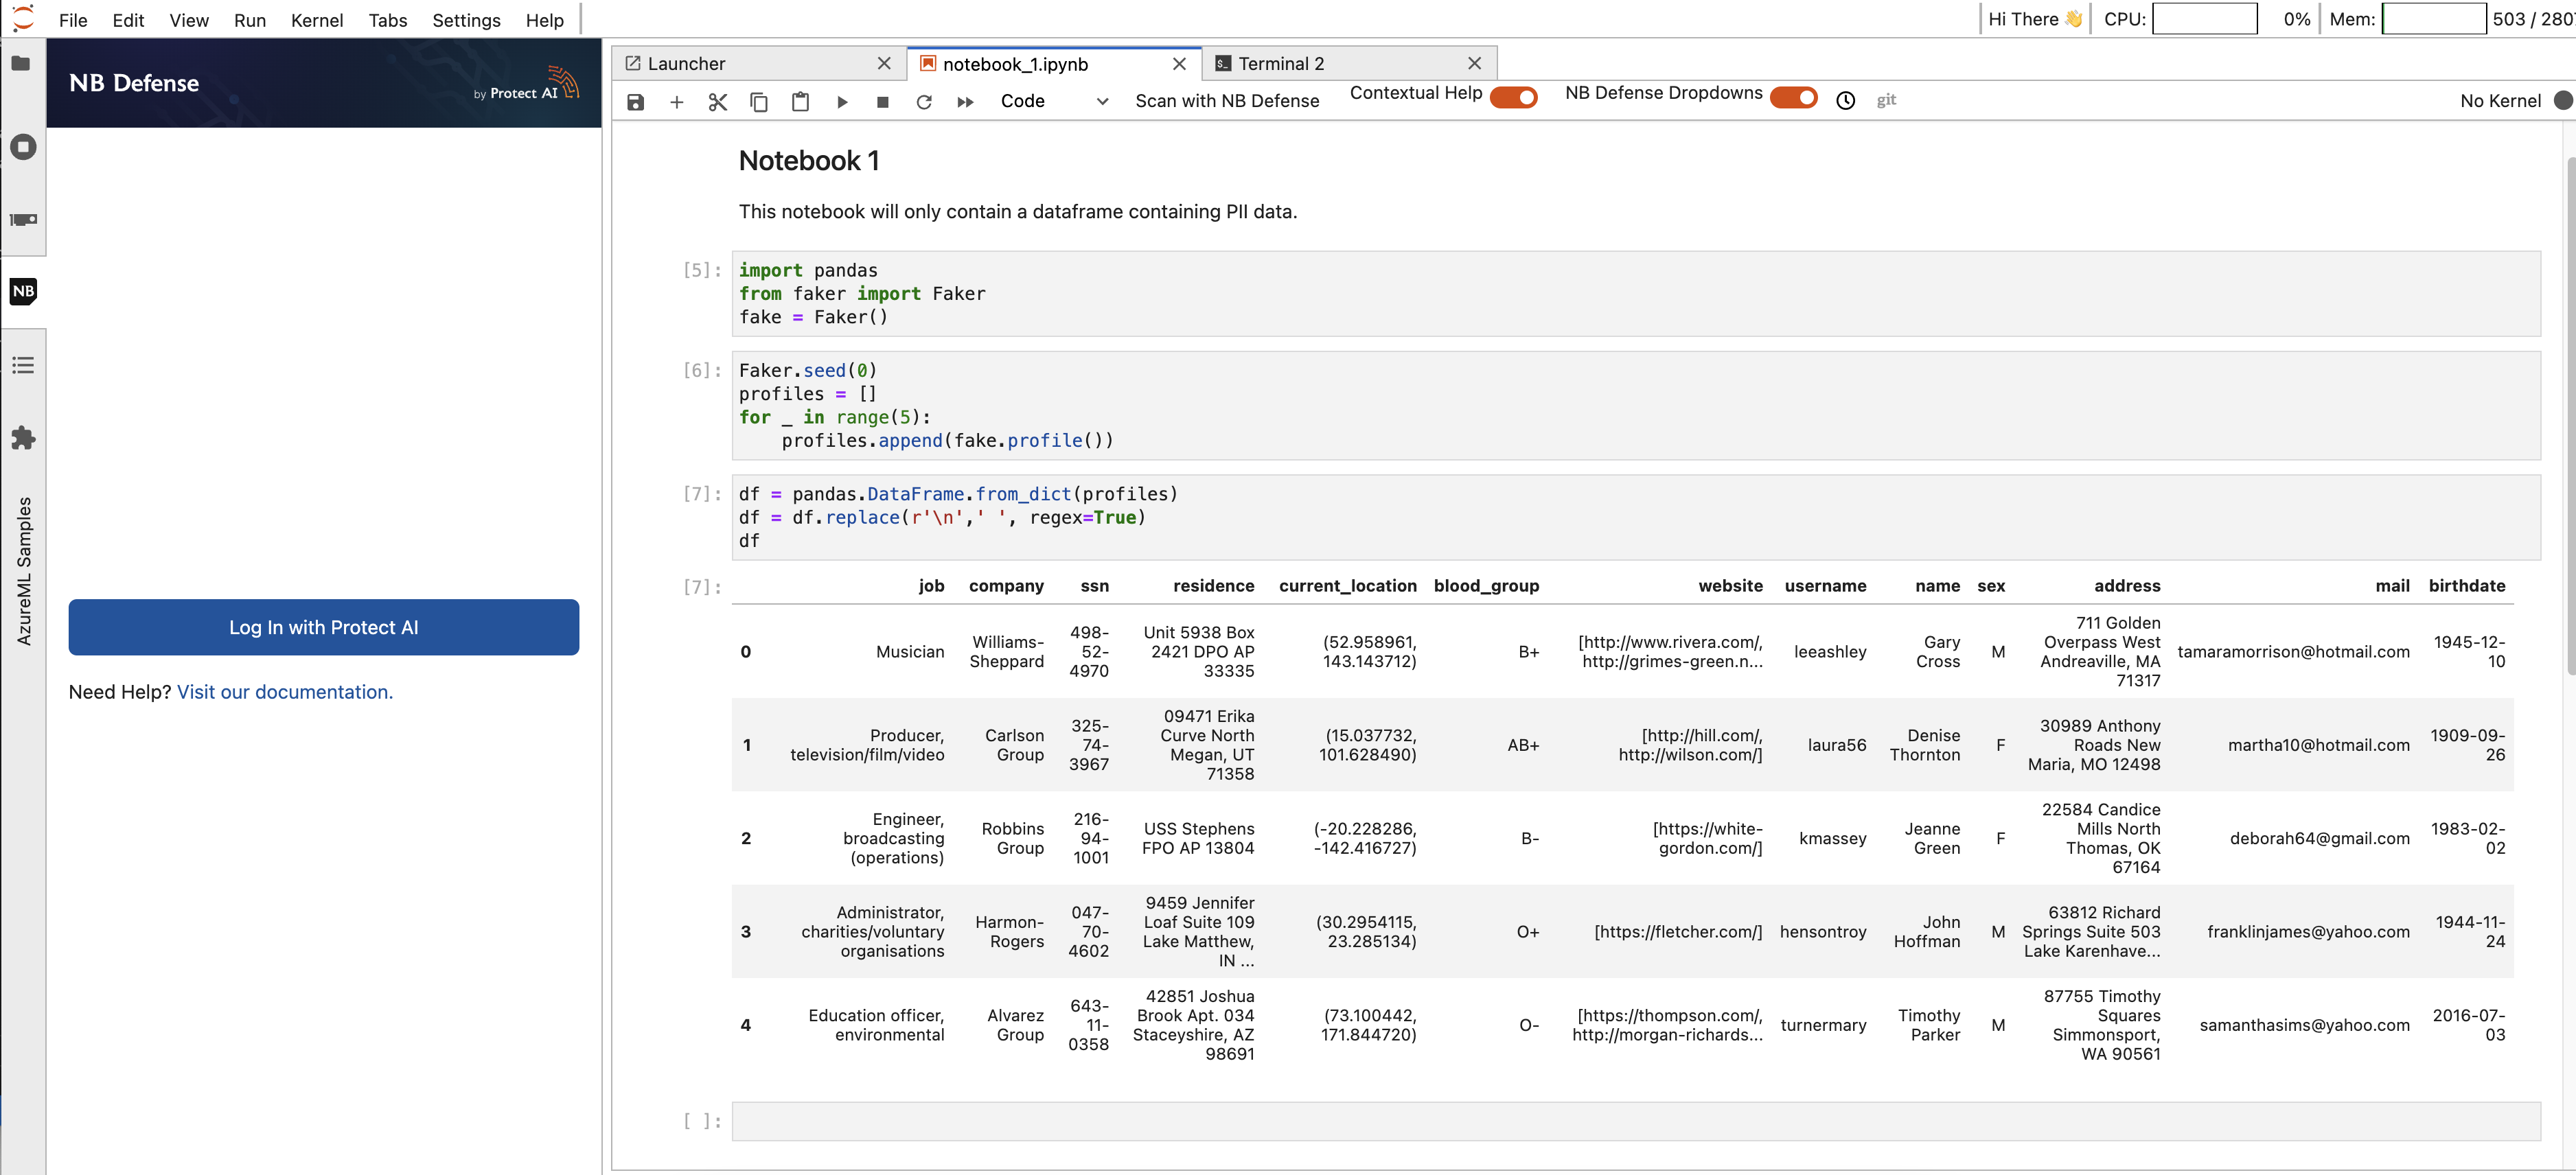
Successful installation of NB Defense JupyterLab Extension (JLE) in Azure Machine Learning Studio.
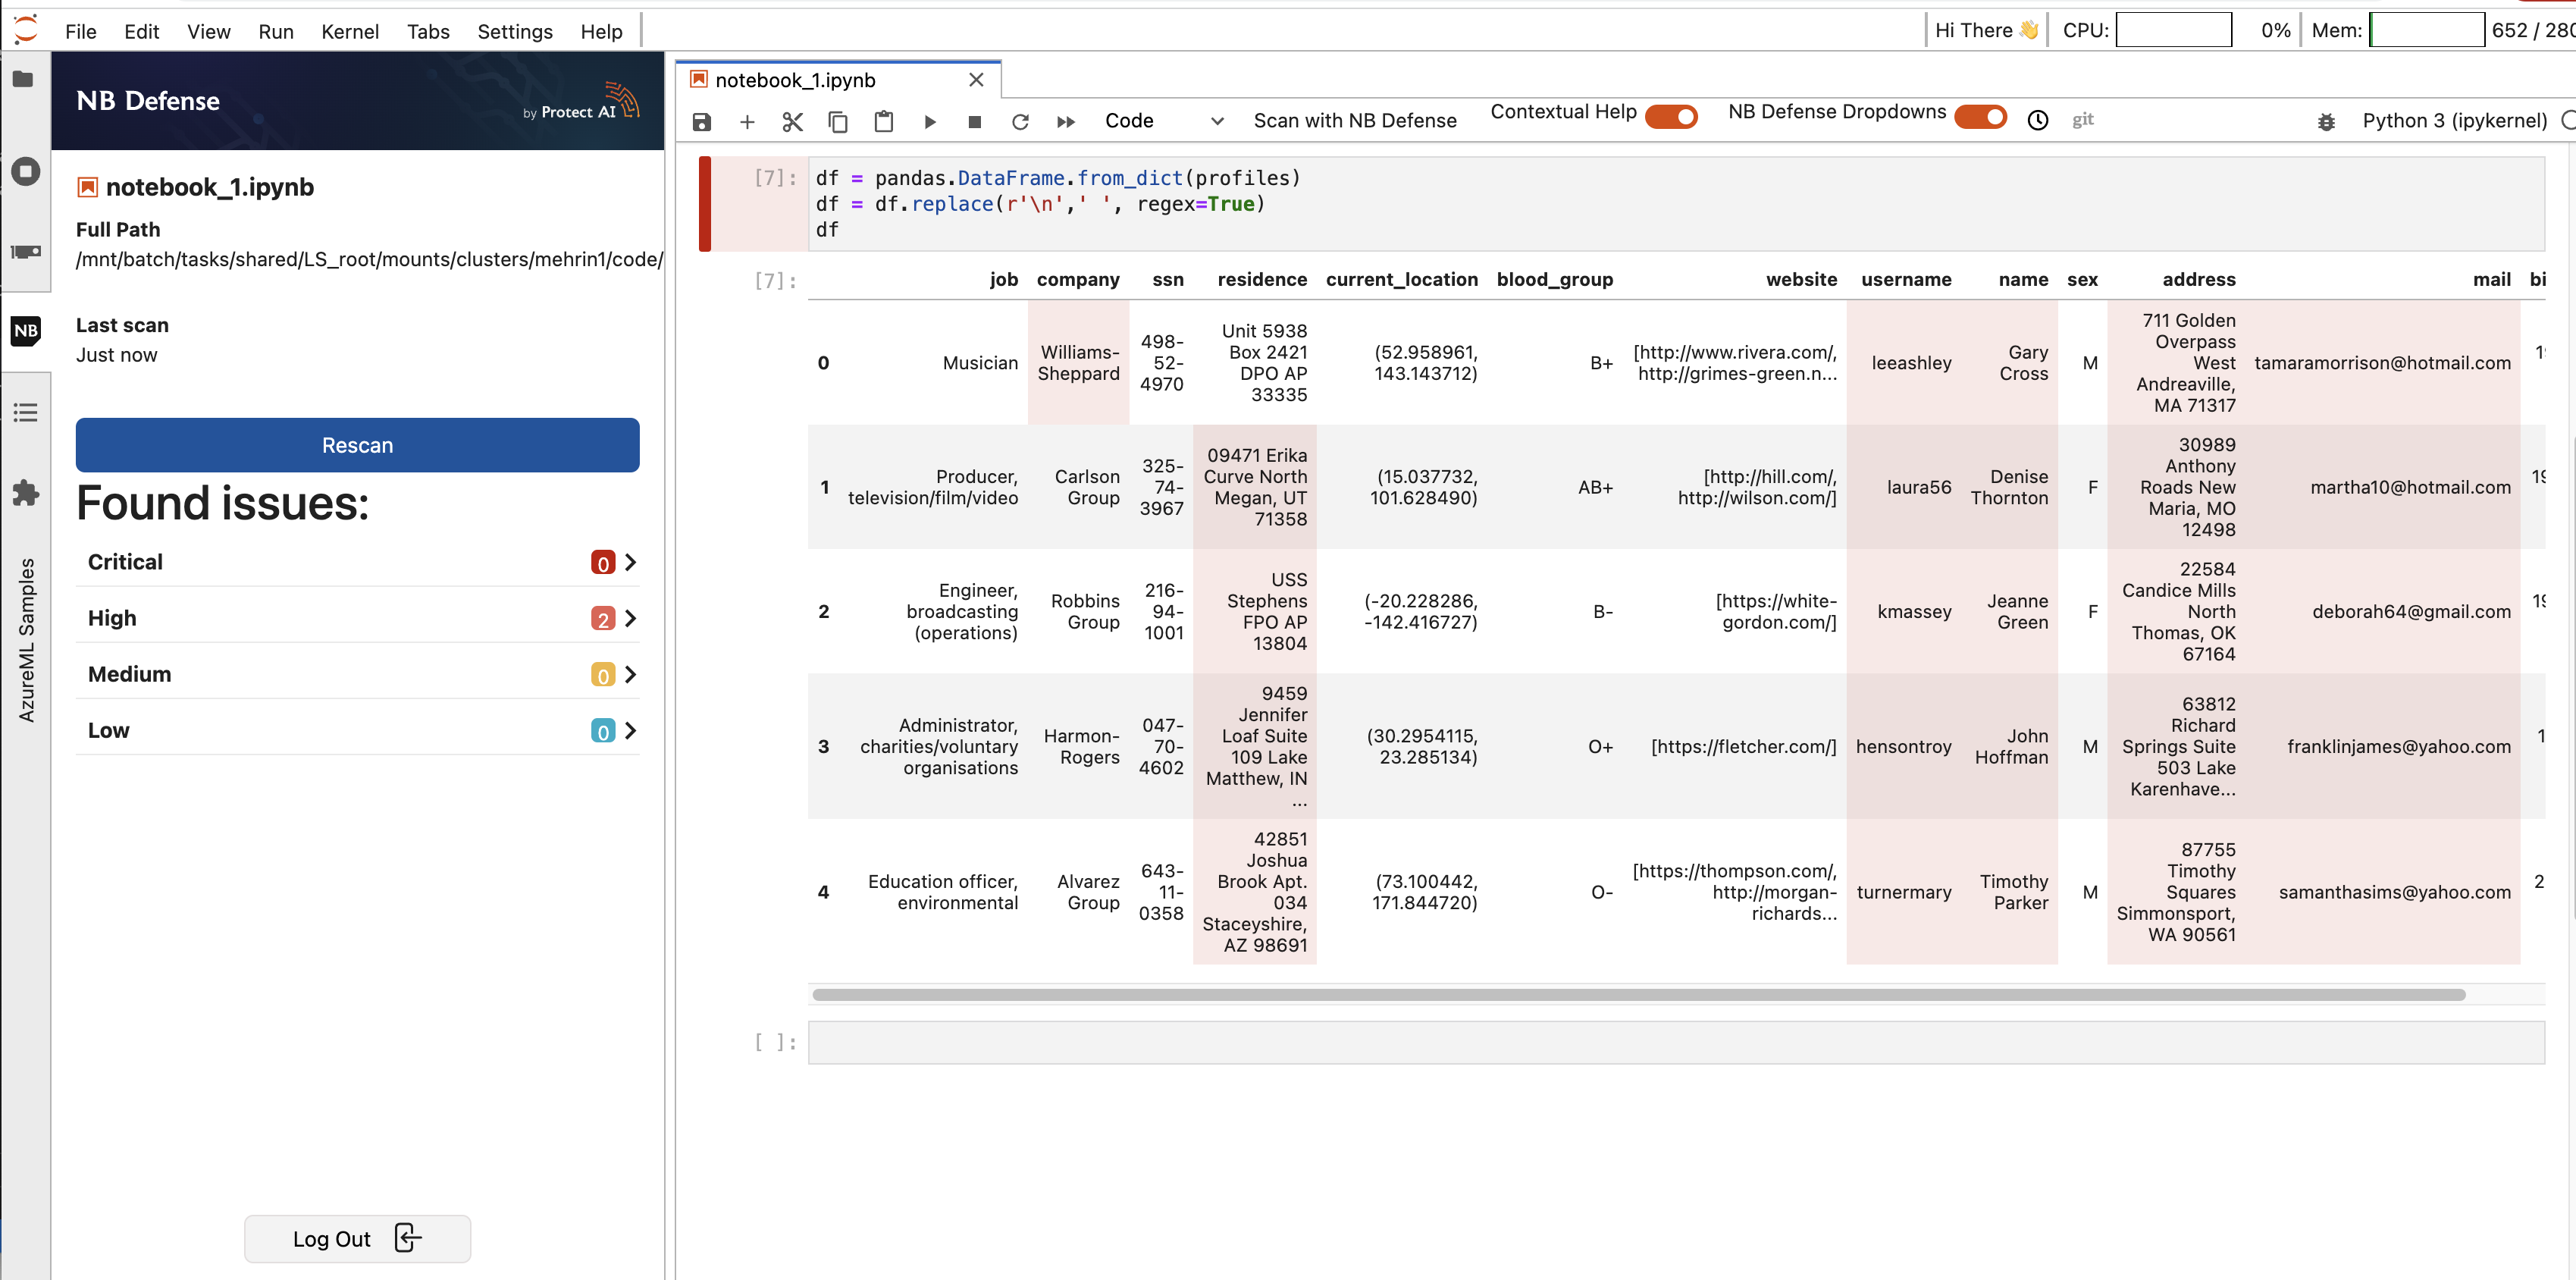
That is it! You can now log in, and press the scan button and see if there are any issues in your notebook as outlined by the NB Defense scan. For example, in the notebook below NB Defense scan has found some personally identifiable information (PII) (note the PII is fake).
 |
|---|
| NB Defense Jupyter Lab Extension (JLE) scan results using Azure Machine Learning Studio. |
Please note that plugin specific settings may not work on notebooks running in Azure Machine Learning Studio.