JupyterLab Extension
Installation
Running NB Defense on JupyterLab in the cloud
The following instructions are for a local installation of JupyterLab. If you are interested in running the JupyterLab Extension on a cloud platform, please visit the JupyterLab Extension on Cloud Services page for instructions for each platform.
-
Activate the Python environment that you use to run JupyterLab.
Supported JupyterLab Versions
The NB Defense JupyterLab extension works with versions of JupyterLab >=3 and <4.
-
Install the extension with pip:
-
(Optional) Install the Spacy model for PII detection with:
Spacy model download
This is required for the PII plugin to operate. If you do not install the
en_core_web_trfmodel, then you will get the following error message in the scan output with the PII plugin activated: -
Activate the server extension with:
-
Start (or restart) the JupyterLab session and the NB Defense extension should be ready to go! You will know the extension has been installed successfully if you are able to see the new NB Defense tab and the
Scan with NB Defensebutton in the toolbar.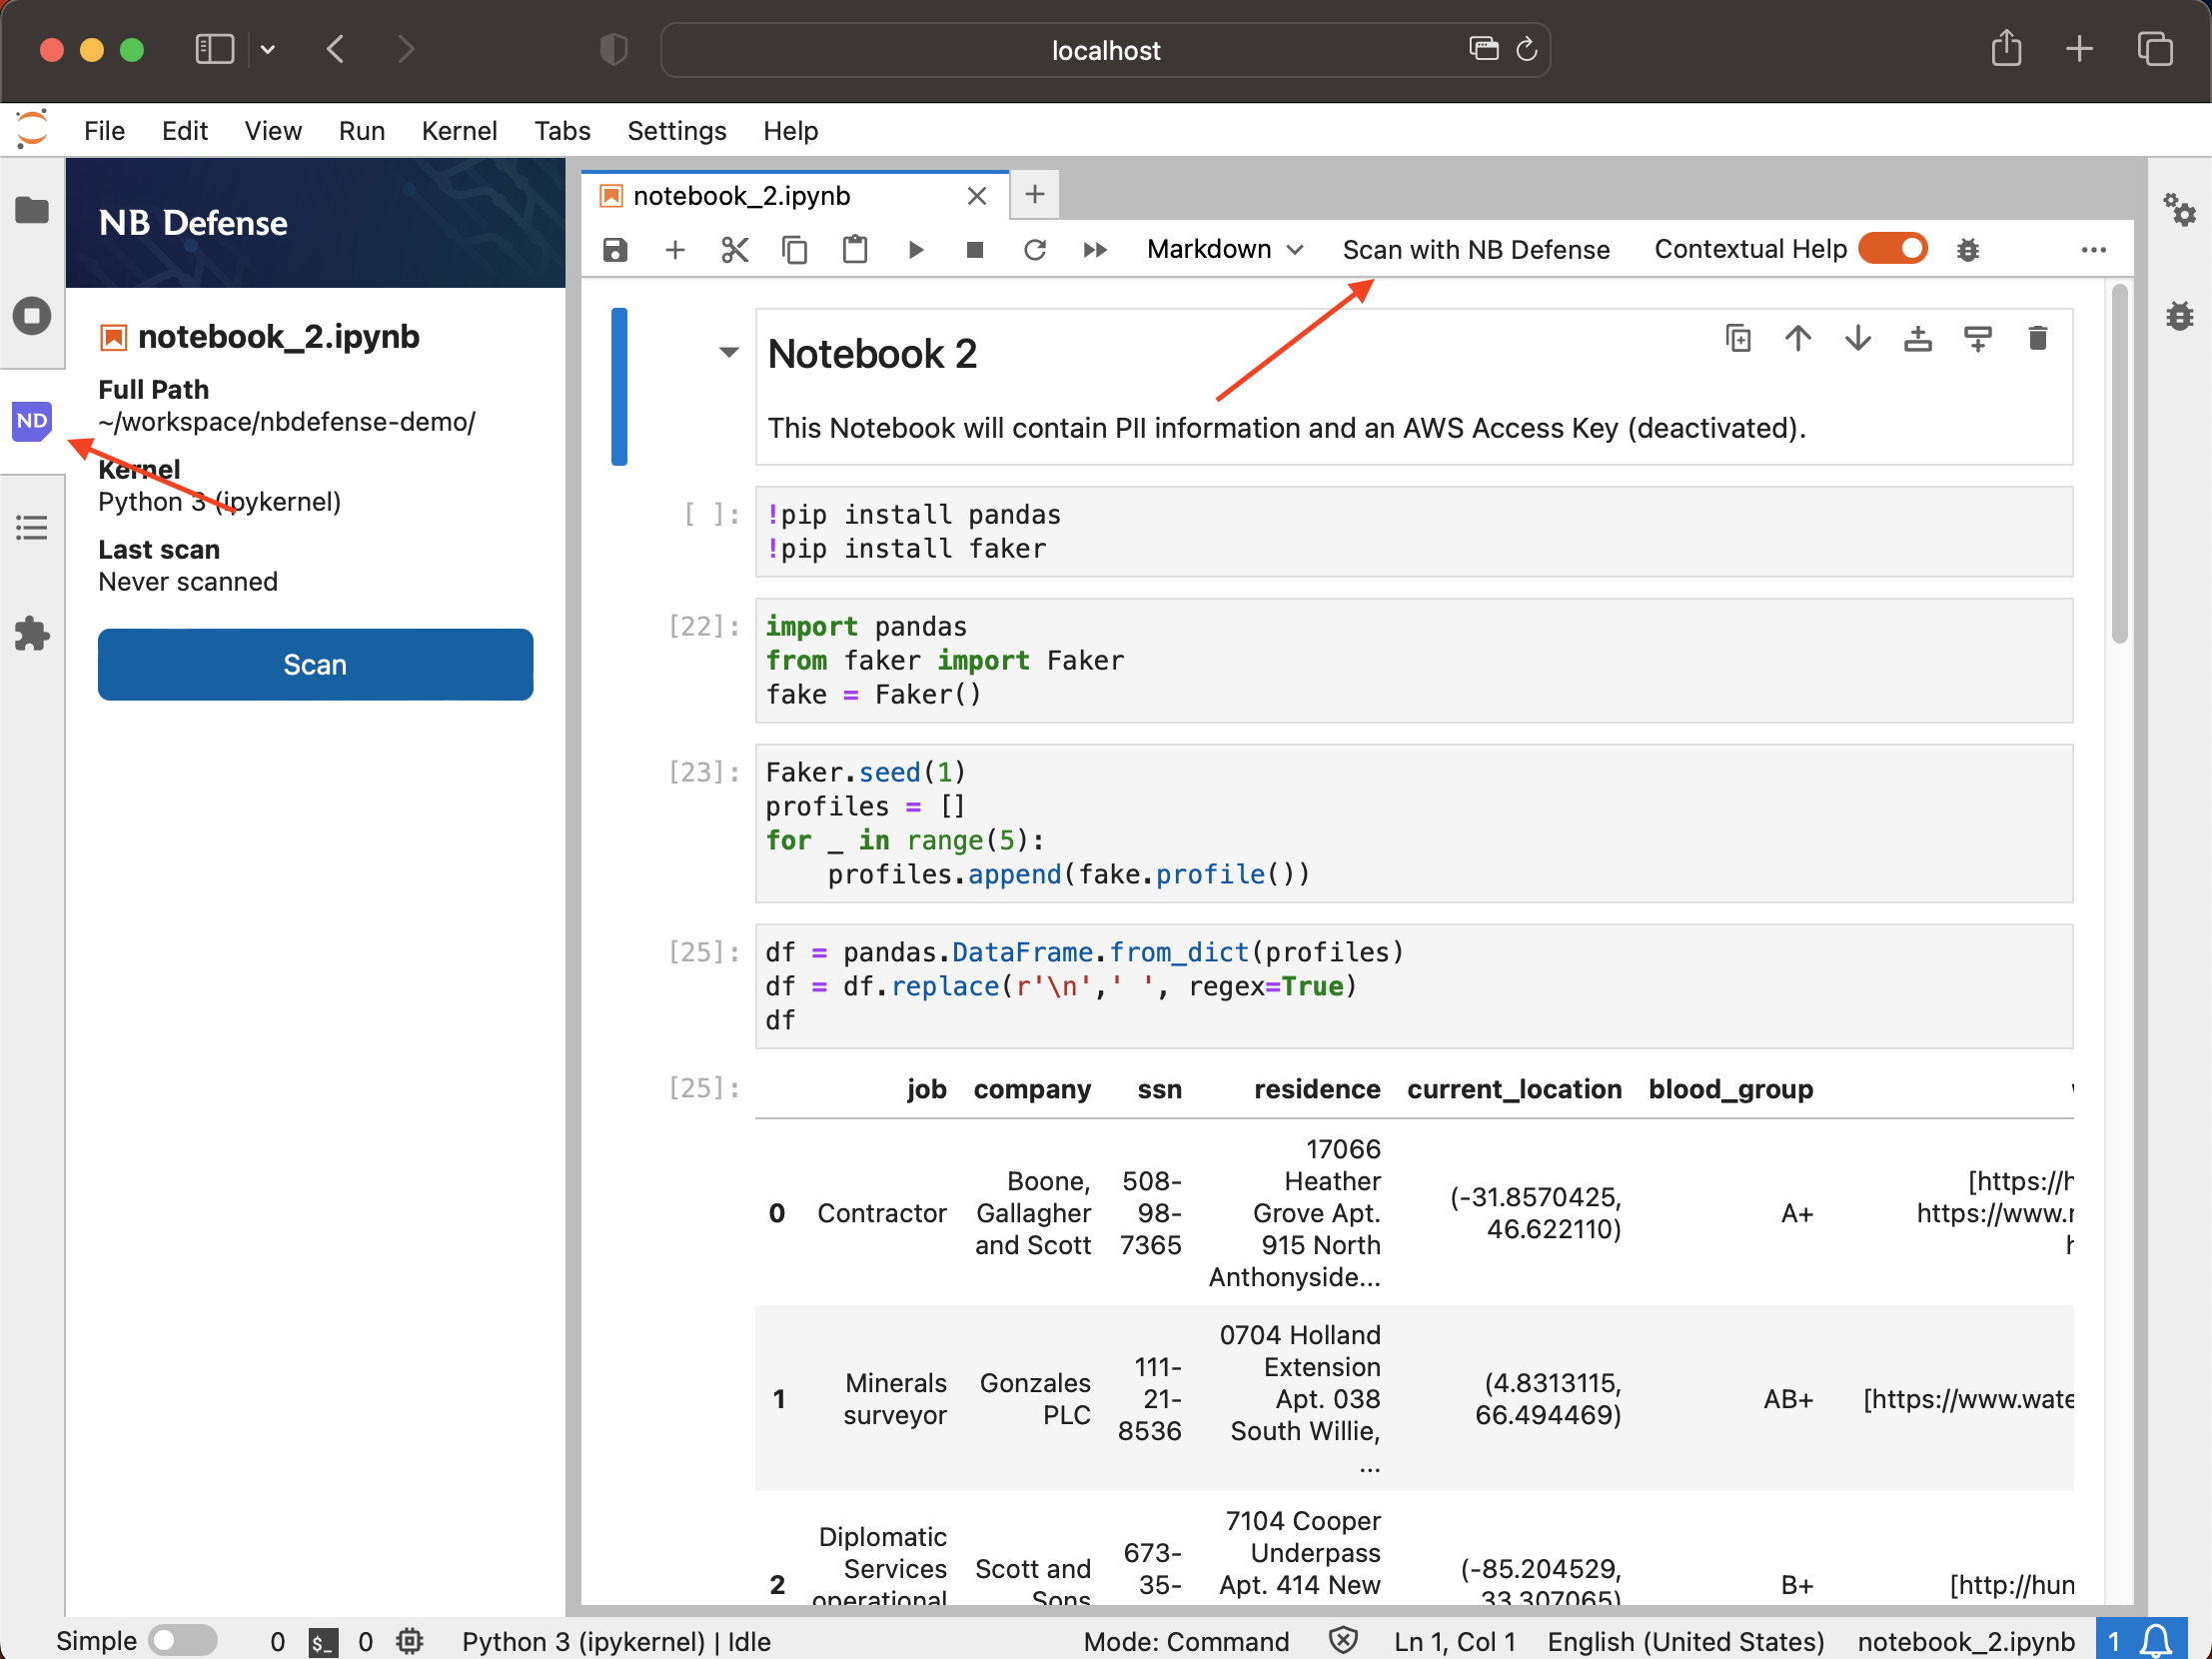
Usage
Once the extension has been installed, you can now start scanning your notebooks within the JupyterLab environment.
Installing the NB Defense JupyterLab Extension (JLE) will add a tab with an NB icon to your side bar. Clicking this will take you to the NB Defense JLE panel. From there you can run a scan or view scan results for the currently focused notebook.
You can also run a scan by clicking the Scan with NB Defense button in the notebook toolbar.
Interpreting Scan Results
Within the side panel we display a list of issues detected during the scan. The information on the side bar includes the "Issue type", a short description of the issue, and which cell index the issue was found in.
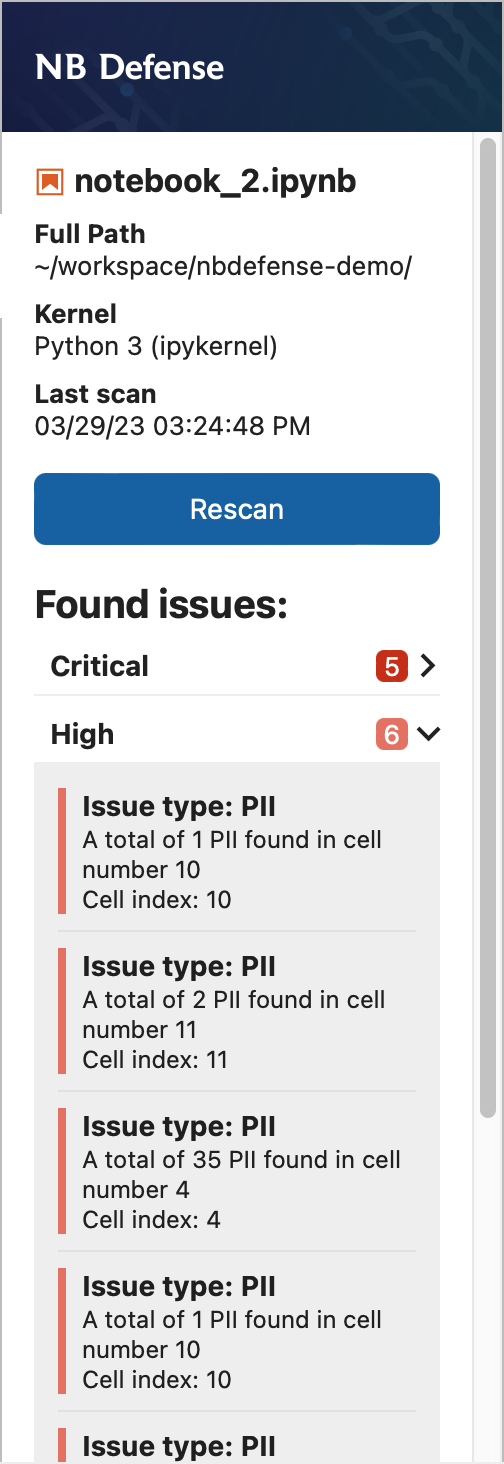
Clicking on one of the issues here will focus the relevant cell. From here you can see that the characters that triggered the scan will be underlined in the editor. Additionally, all of the cells that contain issues will have a red background.
Adjusting Scan Settings
You can change and update settings for your scan from the JupyterLab settings menu. More info is available on the Scan Settings page.